Pages

Friday, November 23, 2012

Vanilla cupcakes with chocolate frosting

There I did it again!I ditched my poor blog once again!!Uninspired, distracted and in an off mood,the reasons are many and I better not get into all that.... Not that I've found my inspiration back,but I fought my mood swings and decided to write another post, just to feed my starving blog and to keep it alive!!!

I had made these yummy cupcakes a while ago for my daughter's friend when she went over for a play date.The cupcakes are definitely the best I've had and I've been baking it over and over since I found it on The Little Teochew (A lovely blog that I blindly trust).They are fuss free,soft and has the perfect crumb!They burst with the freshness of vanilla which makes them simply out of the world!!(make sure you use pure vanilla extract)

So that's it for now.No blah blah's for once.But do give these cupcakes a try sometime.Never again will you go for a store bought cupcake.Never ever!


VANILLA CUPCAKES(adapted from  The Little Teochew)

155 gms plain flour
1 1/4 tsp baking powder
1/8 tsp salt(omit if using salted butter)
113 gms(1 stick butter softened)
170 gms castor sugar
2 large eggs(at room temperature)
1/2 cup milk
1 tsp pure vanilla extract or vanilla bean paste

Method:

Preheat oven to 180 degree C.
Line a muffin tray with paper liners.
Sieve flour with baking powder and salt.
Cream butter until smooth.
Add sugar gradually and beat until light and fluffy(3 minutes).
Add eggs one at a time beating well after each addition.
Add vanilla and combine.
Carefully fold in the flour in three additions alternating with milk in two additions,starting and ending with flour.Do not overbeat.
Spoon the batter into muffin trays filling each about 2/3 full.
Bake for 20- 25 minutes or until a toothpick inserted comes out clean and the cupcake domes are slightly golden brown.
Keep in tray for 15 minutes.
Transfer to wire rack and cool completely before frosting.

Chocolate frosting

3 tbsp butter
1/2 cup sugar
1/2 cup cocoa
1/2 cup cream
1/2 tsp vanilla extract
a pinch of salt

Method:

Melt butter.
Add sugar and cocoa(lumps removed if any)and stir till well combined.
Add cream and stir till smooth and creamy but not boiling.
Take off from flame and add vanilla and salt and mix.
Set aside to cool.

How to frost cupcakes:

Dip the cupcakes upside down into the frosting.
Let the excess drip off.
Turn the cupcake and arrange on a tray and allow to set.


Thursday, June 14, 2012

Shrikhand...Shrikhand...Shrikhand...


Oh,hello friends!Its been quite a while,I know...But sometimes life gets a little too busy and you  just have to keep running with no time to stop and blog.I have a good number of excuses if you ask me...a fondant workshop, an intensive sugar flower course,a few cake decorating projects,sick children,days without a housemaid,guests,hitting the 30's and the depression that came with it.....the list goes on.And finally,a few weeks ago,when I managed to overcome the hurdles and sat down to blog,I was greeted by this absolute stranger on my dashboard...yes!I'm talking about the new,updated blogger interface!!It put me off completely and I was totally uninspired to blog until a few days ago when I made this amazing Indian dessert called the 'Shrikhand'.It was so unbelievably smooth and creamy and dreamy that I simply had to tell the world about it.And so,I decided to finally get acquainted with the stranger on my dashboard!!And though,we are not the best of friends yet,I've made up my mind to get to know him better,little by little,one step at a time!!
I had the first taste of Shrikhand when Arwa of 'I live in a frying pan' got it to the Fooderati Arabia(the food bloggers group in Dubai) picnic and it was so 'yumiliscious' that I almost wanted to grab the dish and run away!!I had made up my mind that I would certainly try it out one day.And finally when I did,I recollected Arwa's tip of adding condensed milk instead of sugar for that smooth,velvety texture. Believe me, it did give an exceptional result!I really don't know what kept me from trying this out for so long.... 
So here I am people,with an amazingly delectable dessert recipe that will definitely make up for abandoning my blog like that.And it is super easy too.Just try it and you'll love it.

WARNING:HIGHLY ADDICTIVE!

SHRIKHAND

3 CUPS CURD(HUNG IN A MUSLIN CLOTH FOR A FEW HOURS OR OVERNIGHT)
1 CUP SOUR CREAM
3/4 TIN SWEETENED CONDENSED MILK(LESS OR MORE ACCORDING TO TASTE)
1 TSP CARDAMOM POWDER
A FEW STRANDS OF SAFFRON SOAKED IN A TBSP OF MILK

Method:
Take the curd out of the muslin cloth.Ensure that all water is drained and it can almost form into a ball.
Mix curd with sour cream,condensed milk, cardamom powder and saffron.
Combine well together with a whisk.
Garnish with almonds or pistachios.
Serve chilled.


Sunday, March 25, 2012

Maggie Beer inspired Chicken pot pie


For me,a pot pie is the ultimate comfort food.What's so comforting about a humble little pie?Is it the flaky,buttery pastry or the rich,creamy filling or the wonderfully melt-in-your-mouth combination of the two?Or could it be all that butter??The big slab of butter that you throw into a pie?

Yes,of course a pie has butter...a good lot of butter.A friend had once asked me if she could make a pie without butter and without refined flour.I suggested that she better not make a pie at all and have porridge instead.Because a pie is a pie is a pie!It is awfully unhealthy and totally tasty.It is an absolute no-no for size zero aspirants,fitness freaks and other poor souls on diet.But there is nothing like a warm pot pie for a tired,exhausted momma like me who does not mind a few extra pounds being added to her already jiggling belly!
This pie recipe is however not my favourite though it is a really,really good one.My favourite pie is my Amma's pot pie which I grew up eating.I guess you'll have to wait for a while for that recipe.But for now,here is one inspired by Maggie Beer's pheasant pie which was featured on one of the episodes of Masterchef Australia.I've adapted her extremely forgiving sour cream pastry recipe which is too good for words.And I've used chicken and mushrooms in a rich, creamy sauce for the filling.How comforting is that?


CHICKEN POT PIE

For the sour cream pastry(adapted from Maggie Beer's pheasant pie recipe)

200g Unsalted butter, chilled
250g Plain flour
125ml Sour Cream

Method:
Pulse the butter and flour in a food processor until it looks like breadcrumbs.
Add the sour cream and continue to pulse until the dough starts to incorporate into a ball.
Wrap in plastic film and refrigerate for 20 minutes.
Roll the pastry to desired thickness and cut 2 circles, 1 bigger for the base of your pie dish and 1 smaller for the lid.
Keep refrigerated while you make the filling.

For the filling

3 boneless chicken breasts(cut into small cubes)
1 packet button mushrooms(halved)
1 onion (cut into fairly big cubes)
1/4 cup plain flour
1-2 cups chicken stock
1/2 cup fresh cream
Good sprinkle of parsley
salt and pepper to taste
olive oil

Method:
Preheat oven to 180 degrees.
Rub chicken pieces with salt,pepper and olive oil.Spread on a baking sheet and bake for 15-20 minutes or until almost cooked.
Heat olive oil in a pan and saute onions until just translucent.
Add mushrooms and saute till mushrooms reduce to half the size and all the water evaporates.
Add flour and cook for a while.(It should not turn brown)
Add stock and stir to remove lumps.
Add cooked chicken cubes and fresh cream and cook till thick.The sauce should be creamy but not clumpy.Add more stock if needed.
Season with parsley,salt and pepper.
Keep aside till it cools.
Preheat oven to 180 degrees.
Carefully transfer the bigger circle of the pastry to the base of the pie dish and gently press down and the sides,making sure there is a little extra pastry around the sides.
Spoon the filling into the base.
Cover with the smaller circle of the pastry and crimp the edges to seal.
Score a cross pattern on top of the pie.
Give the top an egg wash.
Bake at 180 degrees for 45 minutes to an hour,till the crust is nice and brown.

Saturday, March 17, 2012

Gajar ka Halwa/Carrot Fudge


I came across this wonderful Indian dessert recipe in Anjali's Spice and sugar tales and knew almost immediately that it was going to be the dessert for the weekend.Fresh,juicy carrots cooked in whole milk until the carrots turn soft and all the milk reduces to leave behind gorgeous little specks of milk solids....
I'm so glad I tried it.Thank you Anjali for the lovely recipe...it is a keeper!
The only change I made was to add a tin of condensed milk into the milk and carrots,half way through the cooking.But I don't think it made much of a difference.It would have tasted pretty much the same even without it.


You'll find the recipe for this dessert here.I am not writing down the recipe,simply because Anjali has written it down so well with every detail and also because I'm in an extremely lazy mood today.And after you've made it,take a large bowl of this gooey,fudgy dessert,plonk on your sofa,take a mouthful and close your eyes......You'll be thankful...so thankful for the simplest of things like carrots and milk and sugar and cardamom and that lovely Indian great grandmother who first thought of putting it all together to create the glorious "Gajar ka halwa".

Saturday, March 10, 2012

Bow and butterfly cake


This was a cake that I made a while ago,when I was still taking my Wilton lessons.I don't exactly remember the source from where I got the inspiration and idea.All I remember is that the lady in the video tutorial had beautiful,beautiful hands...So beautiful that I looked at my own and felt awfully sorry!

The cake is covered with fondant.And that's the Wilton bow made with a blend of fondant and gumpaste. The gumpaste butterflies were cut out with PME cutters and brushed with gold lustre dust.

Linking this to Cakes,Cookies and Desserts event at Spice and sugar tales.

Sunday, March 4, 2012

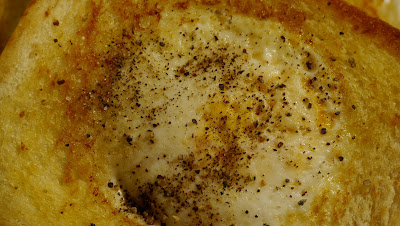
Egg in a hole


There's no doubt that breakfast is the most important meal of the day.It should be a wholesome,healthy and fulfilling meal,loaded with all the vital nutrients to help you live your day.But sadly,nobody in my home seems to have time for an elaborate breakfast.So all they do,most of the time is maybe grab a fruit or gulp down a glass of milk before rushing to their school/office.But whenever my slow and sleepy little girl manages to get ready a few minutes before her school bus arrives,I fix this quick breakfast for her which she enjoys.
'Egg in a hole' is common in breakfast and brunch counters and it is always my favourite to order at one of those live egg stations.When served with some fresh fruits and a glass of milk,it makes a quick and wholesome breakfast on a busy weekday.

Sending this for 'Just for fun' event hosted by Shobha at Good Food.


EGG IN A HOLE

1 egg
1 slice of bread
butter
enough pepper and salt

Method:

Using a medium sized,round cookie cutter,cut out a circle from the middle of the bread slice.
Heat a knob of butter in a non stick pan.
Lay the bread slice in the pan.
Break an egg right into the hole in the bread.
Cook for a few minutes on medium heat.
Flip over to the other side being careful not to break the egg.
Cook until done.
Carefully transfer to a plate and sprinkle with salt and pepper.
Serve hot.

Sunday, February 26, 2012

Cherry slices

Oh Monica,if you ever happen to view this post you can be sure I'm running for cover,hiding my face and sliding under the blanket....because this is so not what you meant it to be!Your recipe was for a chewy bar and what I got was a spongy cake!But you said they would be pretty and pretty they were!So darn pretty that I couldn't help blogging about it!


Ever since I saw these strikingly red beauties posted by Monica a while ago,I've been dying to bake some.And finally when I did get the things ready,I found that I didn't have a sheet pan big enough.So I baked it in a rectangular cake pan(smaller than the size mentioned) and hence the batter baked into a cake....a hot and sexy one!!And it made my heart burst forth into a song...(Ooh la la..Ooh la la from the Dirty picture)
And if you ever want to try this out,you might want to have a look at Monica's blog because that is what the original recipe intends it to be.But,then you won't be baking anything at all because you'll spend the rest of your day just drooling over her incredibly gorgeous recipes and clicks....It is a highly addictive blog so proceed with caution!
And in case you don't have a big enough sheet pan or you are more in a mood for a piece of cake,then just bake yours in a cake pan and you'll get what I got...Ooh la la..Ooh la la...


I'm sending this to the 'Be my valentine' recipe challenge at Very good recipes.com


Also linking it to Cakes,Cookies and Desserts event at Spice and Sugar tales.


CHERRY SLICES

3 cups all-purpose flour
1 1/2 teaspoons baking powder
1 teaspoon salt
1 cup butter(at room temperature)
1 3/4 cups granulated sugar
1/2 cup packed light brown sugar
4 larges eggs
1 teaspoon vanilla extract
1 can cherry pie filling

Method:

Preheat the oven to 180 degrees C. Grease a 9*12 inch cake pan(the original recipe uses 11x17-inch rimmed baking sheet).
Whisk together the flour, baking powder, and salt. Set aside.
Beat the butter and both sugars on medium speed until creamy.
Add the eggs, one at a time, and mix on low speed until well blended.
Add the vanilla and beat.
Add the flour mixture, a little at a time, and beat until smooth.
Reserve 1 cup of the batter.
Spread the remaining batter in the cake pan.
Spoon the cherry pie filling over the top.
Drop the reserved cup of batter by teaspoonfuls,here and there,over the pie filling like uneven dumplings.
Bake for 40-45 minutes, until the batter begins to turn golden.
Remove from the oven and let cool completely before slicing.
Enjoy....Ooh la la..Ooh la la!!

Thursday, February 23, 2012

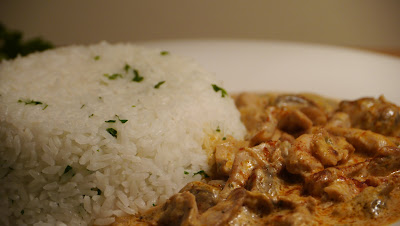
Chicken stroganoff


On Valentine's day I made this for my darling hubby...My charming,sensible and totally adorable six-pack hubby!
Did I hear someone chuckle at the last adjective??
Six packs,I tell you....
Six packs combined into one whole pack and wrapped up somewhere round the belly...He says its easier to maintain it that way!

The Stroganoff is one of my all time favorites.It is the first thing I hunt for in a menu card at any continental restaurant.And over the years, he has grown to like it too.Yess!I've managed to transform my 'kappa, meen curry' loving husband to a 'Stroganoff' loving guy.It wasn't easy at all...Eight long years of hard work and patience; that's what it took!;p And though he annoys me at times by behaving like one of the masterchef judges,I must admit that he's a perfect guinea pig and my most honest critic.
Okay,jokes apart,let me tell you that he's the bestEST thing that has ever happened to me.I'm having the 'time of my life' being his wife and wouldn't trade it for anything else in the whole,wide world!!
And now over to the dish...Stroganoff or Stroganov is a Russian dish of sautéed pieces of beef served in a sauce with smetana or sour cream. From its origins in 19th-century Russia, it has become popular around the world, with considerable variation from the original recipe.Various explanations are given for the name, presumably derived from some member of the large and important Stroganov family, perhaps Alexander Grigorievich Stroganoff of Odessa or a diplomat, Count Pavel Stroganov....
And perhaps you're wondering...'Whats wrong with this woman?Now she's giving history lessons...' Sorry,but this was a bit of information I got when I googled for the right spelling of 'Stroganoff'.Those of you who would like more of history can read it here.Others,come with me...

Though Stroganoff originally is a beef dish,I chose to do a chicken version for the sheer love of chicken.I followed the recipe posted by a member at the Jamie Oliver website with a few,minor changes here and there.And the result was a lovely,classy Stroganoff with succulent pieces of chicken and mushrooms drenched in a creamy sour cream and white wine sauce accompanied with some buttered herb rice...mmmm...heaven!!
Here's wishing all my lovely readers a belated 'Happy valentine's day'.And to you Stroganoff Jem,I can't help falling in love with you a bit more everyday!

CHICKEN STROGANOFF


2 or 3 chicken breasts, cut into strips
1/4 cup flour
1 tbsp olive oil
1 tbsb butter
2 shallots, finely sliced
1/2 packet button mushrooms, quartered
1/4 cup white wine
2 cups chicken stock
1 cup sour cream
2 tsp paprika
1-2 tsp dried parsley flakes
2 cups basmati rice
handful of parsley, finely chopped
salt
freshly ground black pepper

Method:

Cook the rice and toss with parsley and a blob of butter.
Dust the chicken pieces with flour.
Heat the olive oil and butter in a frying pan.
Add the chicken and fry until just cooked through. Remove with a slotted spoon and set aside.
Add the shallots to the pan, adding more olive oil or butter if needed, and cook until softened.
Add the mushrooms and cook further on high until all the water has evaporated.
Add 2 tsp paprika and cook for a while until a warm,earthy aroma rises.
Pour the white wine and stir,scraping out the brown bits from the bottom of the pan.Then simmer until the wine reduces a bit.
Pour in the chicken stock and turn the heat up to high. Reduce the stock by half and then turn the heat down to a simmer.
Add the chicken to the pan, along with the sour cream and stir through. Season with salt and pepper.Sprinkle dried parsley flakes and simmer until the sauce has thickened and is creamy.
Serve, accompanied by the rice and sprinkle some paprika over the Stroganoff on each plate.

NOTE:If sour cream is unavailable to you,fresh cream would be a good substitute.
If you feel your chicken breasts are tough,it is a good idea to give it a gentle steam before cutting it to strips,so that you will not have to fry it for too long.

Thursday, February 16, 2012

Lemon butter cake

'The little Teochew' is my new favorite food blog... Ju,a brilliant cook and a yummy mummy of three, shares her awesome recipes along with some incredible clicks that make you drool right into your keyboard!On a scale of 1 to 10,I would give her an eleven!!
My search results for a good butter cake,led me to her 'orange butter cake' recipe and when I substituted orange zest with lemon zest,I got a 'lemon butter cake'.And it was delightful!Rich,moist and buttery,the cake had a lovely golden crust and the perfect,tight crumb!And the lemony hint was not too overpowering...just right to give the cake a freshness and a gentle lift.Even my daughter who dislikes anything but chocolate and vanilla in her cakes,gave it a thumbs up!
I had plans of adding a lemon glaze,but finally decided against it...Sometimes life calls for a piece of plain ol' butter cake...

LEMON BUTTER CAKE


- 195g all-purpose flour
- 1 1/2 tsp baking powder
- 1/2 tsp salt
- 170g butter, softened
- 225g sugar
- 1 large egg, plus one large egg yolk
- 1 tbsp lemon zest(I used the zest from 2 large lemons)
- 17 tbsp whole milk (The original recipe uses only 12 tbsp,but I found the batter too thick and added 5 more)

Method:
Preheat oven to 180 degree c.Grease a 9" round cake pan.
In a medium bowl, whisk together flour, baking powder and salt.
Using a mixer, cream butter and sugar until fluffy for about about 2 minutes.
Beat in lemon zest, then egg and egg yolk. If the mixture curdles, just add 1 tbsp of flour and continue mixing.
On low speed, add flour mixture in 3 parts, alternating with milk.
Beat for 10 to 15 seconds on medium speed, just until batter appears uniform. The batter should look thick and creamy.
Pour batter into prepared pan and smooth top with spatula or knife.
Bake for about 40-45 minutes, or until it forms a golden crust and an inserted toothpick comes out clean.
Let to rest in pan for 10 minutes, then transfer to a cooling rack. Allow cake to completely cool before slicing.

Sunday, February 12, 2012

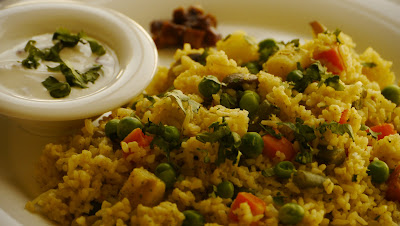
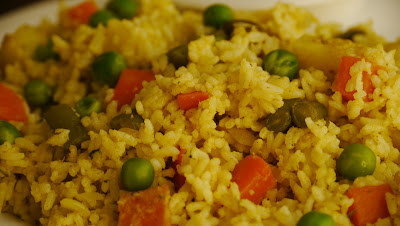
Veg pulav/Tomato rice


I have been married into a wonderful family.United,supportive and happy....a true blessing in every way!A houseful of loving people,who will always be there for each other,come rain or sunshine!
And I have two co-sisters,both of them excellent home makers and incredible cooks.Back home ,whenever I'm with them in the kitchen,I always volunteer to do the dishes because I simply cannot seem to master the art of 'cooking by instinct',without written down recipes or accurate measurements.It is with such ease that they throw in a little bit of this here and a little bit of that there to cook up 'perfect' dishes every time!They have always been a source of inspiration and I've learned so much from them.
The basic rice recipe in this dish is borrowed from one of them,Pinky chechy.She calls it 'tomato rice',and I when I added a good lot of vegetables to it(as my fridge needed a clearing up),it became a veg pulav!And this dish,I tell you,is too good to be vegetarian.It is a favorite even in a 'strictly non-veg' household like mine.Do try it.Tomato rice or veg pulav...either way it is just too good!
Sending this as my entry for the Indian cooking event at Lisa's kitchen.


VEG PULAV

2 cups rice(I like to use jeera rice)
1 medium onion(finely chopped)
2 large tomatoes
A handful of coriander leaves
2 tbsp broken cashew nuts
1/4 cup grated coconut
6 each of pepper corns,cardamom and cloves
2" piece of cinnamon
1 1/2 tbsp ginger garlic paste
2 green chillies crushed(less or more according to your taste)
1 tsp kashmiri chilly powder
1/2 tsp turmeric powder
1 tbsp garam masala powder
Enough refined oil
Vegetables of your choice:
1/2 cup carrot cubed
1/2 cup potato cubed
1/2 cup beans cut into 1/2" pieces
1/2 cup cauliflower split into florets
1 cup button mushrooms halved
1/2 cup green peas

Method:
Cook rice and keep aside.
Saute mushrooms in a little oil over high flame till all the water evaporates and keep aside.
Cook peas in water until soft.
Cook the remaining vegetables(carrot,potato,beans and cauliflower) in a pressure cooker for one whistle.Remove lid to prevent vegetables from losing color and keep aside.
Blanch tomatoes in water,peel skin and puree in mixer.
Soak coriander leaves in water for a while and grind in mixer.
Grind the cashew and coconut together with a little water to make a paste.
Heat oil in a large kadai and splutter the spices.
Add ginger garlic paste and green chillies and stir for a minute.
Add chopped onions and stir till translucent.
Add the powders(chilly,turmeric and garam masala) and stir well.
Cook till the raw smell goes and the oil rises to the top.Sprinkle a little water if necessary.
Add the coriander paste and cook for a while.
Add the tomato puree and stir.Cook on medium-low flame till well cooked and an aroma rises.
Add the cashew /coconut paste and cook while stirring.
Add the cooked vegetables including the peas and mushrooms and mix carefully.
Remove from flame.
Take a large pan,add the rice and gravy alternately and start mixing it together little by little until you feel that you have added enough gravy to coat all the rice and give it a beautiful golden color.Adding more gravy makes the pulav clumpy and less makes it dry.Reserve the remaining gravy in the freezer for later.
You can bake this for 10 to 15 minutes in a hot oven or microwave it for 3-4 minutes because the rice would have cooled a bit by now.
Garnish with chopped coriander leaves and serve with raita and achar.

Note:Just don't add the vegetables to the gravy for the tomato rice variation.

Thursday, February 9, 2012

My very first award!

This was totally unexpected.
My blog's pageviews were decreasing by the day and I was a bit demotivated.I know I have to do more 'blog marketing' but when?My life is entirely at the mercy of a busy lil' toddler and I barely manage to do a post or two every week.And then,out of the blue came this award from dear, dear Alida of 'My little Italian kitchen'.It was my very first award from a fellow blogger and I was delighted.Thank you Alida for being so thoughtful...I just realised that it is worth to go on for a few special friends like you!


Liebster means favourite or dearest in German. It is meant for newbie blogs with less than 200 followers.

Rules for accepting the award:

- Thank the person who gave the award and link back to their blog.
- Copy and paste the award to your blog.
- Reveal the 5 blogs you have chosen to award and let them know by commenting on their blog.
- Hope they pass it forward by accepting and awarding it to bloggers they would like to honour

And I pass it on to:

Baketitude
Good food
Naughty curry
Only fish recipes
Teenz' yummy delights


Thanks again Alida.....be blessed always!

Wednesday, February 8, 2012

Biscuit pudding....for the soul!


Darlings,you haven't lived until you've tasted this absolutely creamy,dreamy,delicious,calorie laden,knock your socks off,ultimate dessert!And if such food couldn't make you fat or clog your arteries or stop your heart,I would be having this every day of my life...for breakfast lunch and dinner!
This recipe comes from my best friend Reshma.A few years back,I visited her at her home in Palakkad and we spent some good time together.Her mom cooked a yum biriyani for lunch and Reshma made this wonderful pudding for dessert.One spoonful and I fell in love with it instantly!It was entirely different from the biscuit pudding that I had been eating all my life(biscuits soaked in coffee,layered and drizzled with cocoa sauce and topped with beaten egg whites).Back home,I jotted down the new recipe quickly and it remains my favorite dessert to this day!
'My favoritest dessert by my bestest friend!'
Bad english,I know....but I'm just a little tipsy after shamelessly devouring half a tray of this scrummy pudding!
I tweaked the original recipe here and there to make the sin more unpardonable.I used milk biscuits instead of arrowroot biscuits and I also added a layer of custard.And since it is February and most of us would have already waded off our healthy new year resolutions,go ahead and dunk in!!


Linking this to the Cakes,Cookies and Desserts event at Spice and sugar tales.

BISCUIT PUDDING

500 gms plain milk biscuits(Brittania milk bikis)
100 gms butter(softened)
2 tbsp cocoa powder
3/4+1 cup milk
1/2 cup sugar+extra for the custard
1+1 tsp vanilla essence
1 egg
1 tsp coffee powder
2-3 tbsp hot water
1 cup fresh cream
1 tbsp powdered sugar

Method:

Using your hands,break biscuits into small pieces.
Rub in the butter until all the biscuit pieces are well coated.Keep aside.
To prepare chocolate sauce,combine cocoa powder,3/4 cup milk,1/2 cup sugar and 1 tsp vanilla essence.Make sure all lumps are removed.Keep on medium-low flame and stir for 8 to 10 minutes.Keep this aside.
Make custard by double boiling 1 cup milk,1 beaten egg and enough sugar.Keep stirring till custard reaches a thick consistency. Remove from flame and add 1 tsp vanilla essence.Strain to remove lumps and keep this aside.
Mix 1 tsp coffee powder in hot water and keep aside.
Layer a pudding dish with half the biscuits.Pour half of the chocolate sauce over the biscuits,followed by half of the custard.Sprinkle half of the coffee over this.Repeat with the next layer - biscuits,chocolate sauce,custard and coffee.Press down with a spatula so that all the biscuits are well immersed in the sauces.
Refrigerate for at least half an hour or until partly set before topping with fresh cream.

Fresh Cream Topping

Make sure the fresh cream is well chilled.You can also freeze your whisks and mixing bowl for 15 minutes to quicken the beating process.Sometimes it helps if you beat with your bowl kept over ice cubes.
Beat chilled fresh cream until smooth.Add powdered sugar and beat again until soft peaks form.
Spoon uniformly over the pudding.
Decorate by sprinkling chocolate sauce or chocolate shavings.
Enjoy!Enjoy!Enjoy!

NOTE:The pudding tastes best if it is kept outside the refrigerator in room temperature for 10 minutes before serving.

Tuesday, January 31, 2012

Pinwheel sandwiches

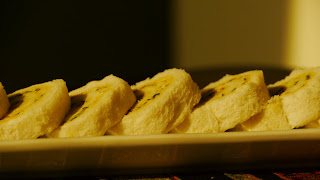
A brilliant idea for picnic baskets,birthday parties or even lunch boxes.These colorful,bright and super tasty little sandwiches are absolute delights.And the best thing is that it can be made a day or two in advance and refrigerated so it saves you the last minute rush.
This recipe is again from my Amma's cookbook.I grew up eating these.She made it every time we had our school friends over,or whenever we took a long road trip,or during train journeys from Cochin to Calicut(for a vacation at my maternal grandparents).Good ol' days!


On Sunday,my daughter's school was taking their class for a trip to the zoo,and I thought of making these sandwiches for her lunch box.And I thought they would look good on my blog too.....

The biggest challenge however, was to find a perfect loaf of bread,whole and unsliced.All the neighborhood bakeries and supermarkets turned me down.Finally we had to drive all the way down to Spinneys,Al Wasl,to find a large loaf of white bread...Maybe next time I'll try making it with brown bread for a healthier version.

PINWHEEL SANDWICHES


1 large loaf of bread(unsliced)
1/2 cup beans(very finely chopped)
1/2 cup carrots(very finely chopped)
3 large eggs(boiled)
Butter 100 gms(or a little more)
1/2 cup cheese(grated)
Salt to taste
Pepper to taste

Method:
Cut the brown crust off the bread from all six sides.With a serrated knife,slice it horizontally into long slices about 3/4 of an inch in thickness.
Sprinkle about 1/4 cup water over the finely chopped carrot and beans and give it a quick steam on high flame for about 2 minutes.Do not overcook as the vegetables may loose their color and crunch.Strain and keep aside.
In a bowl,mash the boiled eggs well,using a fork.
Add the vegetables,salt, pepper and cheese.Mix until well blended.
Add butter and mix well.The mixture should be of a spreadable consistency.
Take each long slice of bread and steam it until it is warm and soft.Steaming ensures that the slices roll up easily without cracking.
Take it out of the steamer and immediately spread an even layer of the egg/veg mixture.Do not spread it too thick as it may ooze out while rolling.
While still warm,roll it up into a log.
Repeat with all slices of bread.
Cover with foil and refrigerate till the butter is set and the logs take their shape.(A few hours or overnight)
Trim off the uneven edges from each log and slice into uniform rounds or pinwheels.
Enjoy!

NOTE:To slice your loaf with ease,refrigerate it for a few hours or better still,use it the next day.

Saturday, January 28, 2012

Cinnamon and brown butter breakfast muffins


Cinnamon is my new favorite spice.In fact,I'm so obsessed with it that I crave for something 'cinnamony' every now and then and I cannot take my mind off it,until I get a bite.And no...I'm not pregnant.But I'm still nursing my toddler and I need my nutrients!So most of the days my poor hubby has to stop by 'Cinnabon' on his way back from work to buy his wife some lovely cinnamon rolls.See what a sweet hubby I've got...The best in the world!
The other day as I was browsing through my favorite blogs,I was smitten by these muffins at the Smitten kitchen.And I had this sudden urge to bake some.The dishes were piled up in the kitchen sink and the laundry had to be done.But all that could wait.... this couldn't!I simply had to bake some.It was an emergency!!
So off went a batch into the oven.Quick and easy to put together,these muffins are a lovely addition to the breakfast table.The nuttiness of the brown butter and the subtle twist of the cinnamon blends together perfectly.
They did puff up beautifully......

CINNAMON BROWN BUTTER BREAKFAST MUFFINS(makes 12 standard sized muffins)

1 1/2 cups all-purpose flour
1 1/2 teaspoons baking powder
1/2 teaspoon baking soda
1/2 teaspoon table salt
1/4 teaspoon freshly grated nutmeg
1/2 teaspoon ground cinnamon(My addition.Not in the original recipe.)
1/2 cup granulated sugar
1/3 cup unsalted butter, at room temperature
1 large egg
1 teaspoon pure vanilla extract
1/2 cup buttermilk

Method:
Preheat oven to 350F/180C.Grease or line a muffin tray with paper liners.
Whisk together flour, baking powder, baking soda, salt, nutmeg and ground cinnamon together in a bowl and set aside.
Beat softened butter and sugar together until light and fluffy.
Add egg and vanilla and beat until combined.
Mix in 1/3 of flour mixture, followed by 1/2 of buttermilk, repeating again and finishing with the flour mixture. Mix only until combined.
Spoon into muffin cups, filling only 3/4 of the cups.Take care not to overfill.
Bake muffins for 20 to 25 minutes or till a toothpick inserted comes out clean. Keep them in the tray for 5 minutes and then transfer them in to a wire rack.

While the muffins are still in the oven,prepare the brown butter and the cinnamon sugar.

BROWN BUTTER,CINNAMON SUGAR COATING


2/3 cup granulated sugar
1 tablespoon ground cinnamon
6 tablespoons unsalted butter

Method:
In a small saucepan, melt 6 tablespoons butter over medium heat,stirring frequently, until brown bits form on the bottom and it gives a warm,nutty smell.
Immediately remove from heat and set aside.
Combine 2/3 cup sugar and cinnamon and set aside.

TO COAT MUFFINS:

As soon as the muffins are cool enough to touch,take each muffin and roll the top and upper edges in the browned butter.Do not neglect the wonderful brown bits at the bottom of the pan.
Let any excess butter drip off.
Gently roll in cinnamon-sugar.
Arrange on a tray and serve warm.

Monday, January 23, 2012

Chinese rice and beef dish


The Chinese have probably not heard of this!

Pardon me China,for taking your name in vain.But that is the title given for this recipe in my Amma's old,torn and tattered,yellow pages almost falling apart,yet a million dollar worth recipe book.And she is going to state in her will that this book,along with the other precious recipe books(the dark blue binder and the orange german note book)has to be rightfully handed down to her first born and favorite daughter...;p Did the other daughter get the message clear?
Well,I'm assuming that some old grand aunt of mine would have cooked up this dish in her Indian kitchen and since it uses a few Chinese ingredients,she called it 'The Chinese rice and beef dish'.But it is so yum that I don't think the Chinese will ever complain!
For me it is pure comfort food.Perfect for the weather.Enjoy it piping hot on a cold,rainy day.Bliss!!


CHINESE RICE AND BEEF DISH

Rice 2 cups
Beef 500 gms(cut into small chunks)
Cornflour 2 tbsp + enough to thicken gravy
Onion 1(cut into fairly big cubes)
Green chillies 2(finely chopped)
Garlic 4 cloves(finely chopped)
Capsicum 1/2(cut into big cubes)
Pepper
Salt
Soy sauce 1 tbsp or more
Salad oil
Spring onion(finely chopped)

Method:
Cook the rice and keep aside.
Pressure cook beef with enough salt and pepper till just tender.Separate the stock and the meat.
Mix cornflour with cooked beef and leave aside for sometime.
Fry the beef in salad oil until nice and brown.Do not over cook.
In a pan,heat salad oil and fry the garlic and green chillies for 30 secs.
Add onion and stir fry until just translucent.
Add the fried beef and stir well.
Add soy sauce and enough pepper and salt.
Now mix enough cornflour(I added a tsp)into the stock and pour it into the pan.
Wait for it to boil and thicken.The gravy should be nice and thick not runny.So pour the stock accordingly.
Put some rice in a plate and pour the beef gravy generously over the rice.
Garnish with spring onion and serve hot.

Friday, January 20, 2012

Pan grilled salmon served with hung curd dip, mashed potatoes and steamed greens

This recipe comes from my dear aunt Teena and since this blog is going to feature many many recipes from this source,I think it would be good to introduce her to all my readers(if there are any at this point).Well,she is my mom's youngest sister...her favorite and mine too!!I should say I've never seen a more lively, happier person in my life.Her tiny frame is filled with so much of positive energy and her cheerfulness and laughter is so very contagious.I've always loved being with her....laughing our hearts out at the silliest of jokes,late night chats,fooling around,shopping,....oh how I miss her!!And of course she is a fabulous cook and was my greatest inspiration to start cooking.Her recipes are all winners(tried and tested in her kitchen before passing it on) and she is always ever ready to share all her prized recipes with every little detail.Love you Teena chechy....you are the yummiest aunt ever!!
Now onto the dish...Please don't let the rather long title stop you from trying it.It is in fact a simple,easy and quick-to-fix recipe.It uses no fancy ingredients,no complicated steps and the whole dish can be put together in less than an hour.A hearty,healthy,happy meal in no time!

PAN GRILLED SALMON(Meal for 2)

Salmon (cut into medium sized fillets)-2 pieces
Ginger-1 piece
Garlic-1/2 pod
Coriander leaves-1 handful
Green chillies-2(reduce amount if you want it less spicy)
Whole black Pepper-1/2 tsp
Salt to taste
Juice of 1 small lemon
Olive oil

Method:
For the marinade,grind ginger,garlic,coriander leaves,pepper and salt together in a mixer and make a smooth paste.
Make slits on the salmon fillets and smear generously with lime juice.
Marinate the pieces with the above paste and set aside for at least 1/2 hr.
Drizzle olive oil in a non stick pan and heat it.
Lay the salmon on the pan and cook on medium low heat till the fish is cooked through on one side.Gently flip over and cook on the other side.The fish should be flaky and appear charred here and there.
Remove from pan and serve hot with hung curd dip,mashed potatoes and fresh,steamed greens of your choice.

HUNG CURD DIP

Curd-1 cup
Garlic-5-6 cloves(ground coarsely)
Onion- 1/2(finely chopped)
Coriander leaves(finely chopped)
Salt to taste
Pepper to taste

Method:
Hang curd in a muslin cloth until all the water is drained off(a few hours).
Whisk until smooth and creamy.
Add all the other ingredients and mix well.

Sunday, January 15, 2012

A castle cake for my princess!!


I almost broke my new year resolution which was to feed my hungry blog with at least one post a week.I am late by a day and I blame it all on this cake!But I guess it is better late than never...at least I have something good enough to blog about.
It was my daughter's seventh birthday on the first of January and since it fell in the midst of holidays and she wanted her classmates to be there for the party,we hosted a birthday party for the darling yesterday.And this was the b'day cake her loving mommy made for her!
Happy birthday Esha...cant believe you are seven years old!You are a wonderful child and a true princess.May God bless you always.Love you to bits!!

Saturday, January 7, 2012

A fondant covered cake and a big dream!


Ta da.......!

Ladies and gentlemen,put your hands together for Ramya and the Best cake of the show!!The stage is lit and the music plays as I walk the ramp in my off-shoulder,figure-hugging,knee-slit designer gown.The crowd is crazy,throwing roses and other wonderful things to show their admiration....Ouch!did somebody throw a slipper??Never mind...I take a bow and blow a kiss,then take a bow and blow a kiss,take another bow and then...TTRRIINNGG!!!
I jumped up on the bed.....and stared at the bedroom wall...No Oklahoma cake show,no crazy crowd,no music,no lights,no stage,no roses....ah yes,there were a couple of slippers lying around and three bodies curled up in bed next to me....it was just another cold,dark morning and boring daily chores to look forward to!

Well,look what one little wonderful cake can do to a poor woman?Ever since I finished my Wilton course three final cake,which was spectacular,mind blowing and delightfully gorgeous(sorry for being such a braggart!),this is what I ever do ...dream of becoming a celebrity cake decorator when I am not even sure if I will be able to do a second cake as good as this one!
It was no doubt difficult to put together with a troublesome toddler and a school-goer to take care of.However the end result was rewarding.I was so much in love with it,that the thought of having to cut it broke my heart.So I decided not to cut it and it stood on the dining table for two weeks until I finally dumped it.Experienced cake decorators may point out a thousand flaws,but to me,it is a masterpiece!Makes me proud of myself!
And did I master the art of cake decoration??My next cake will perhaps give an answer!

Thursday, January 5, 2012

Chocolate sour cream cake with chocolate sour cream frosting


This is from Monica's lovely blog.I love all her recipes and this one is definitely a keeper!A rich,dark,moist and decadent chocolate cake!The frosting(it uses sour cream) is from a different recipe in the same blog.I wanted to use my leftover sour cream before expiry.I however had to add more icing sugar to the frosting to convert it from the pourable to the spreadable consistency! But as she said,any frosting works well with this cake or it can be enjoyed plain as well.Go on and give it a try..Its awesome!

Linking this to Cakes,Cookies and Desserts event at Spice and Sugar Tales

Chocolate sour cream cake
(This recipe makes a really huge cake.I halved the recipe)

* 1 cup unsalted butter, softened at room temperature
* 3 cups light brown sugar, packed
* 4 eggs
* 2 teaspoons pure vanilla extract
* 3/4 cup unsweetened cocoa powder
* 1 tablespoon baking soda
* 1/2 teaspoon salt
* 3 cups sifted cake flour
* 1 1/3 cups sour cream
* 1 1/2 cups hot coffee

Preheat the oven to 350 degrees. Butter and flour 3 (9-inch) cake pans. Cut 3 circles of waxed paper or parchment paper to fit the bottoms of the pans, then press them in.

In a mixer fitted with a whisk attachment (or using a hand mixer), cream the butter until smooth. Add the sugar and eggs and mix until fluffy, about 3 minutes. Add the vanilla, cocoa, baking soda and salt and mix. Add 1/2 of the flour, then 1/2 of the sour cream and mix. Repeat with the remaining flour and sour cream. Drizzle in the hot coffee and mix until smooth. The batter will be thin.

Pour into the prepared pans and bake until the tops are firm to the touch and a toothpick inserted into the center comes out clean (a few crumbs are okay), about 35 minutes. Halfway through the baking, quickly rotate the pans in the oven to ensure even baking, but otherwise try not to open the oven.

Let cool in the pan 10 minutes. Turn out onto wire racks and let cool completely before frosting.

Chocolate sour cream frosting

* 12 ounces bittersweet or semi sweet chocolate, chopped
* 1 stick (4 ounces) unsalted butter
* 2 tbsp light corn syrup
* ¼ cup half-and-half at room temperature
* ½ cup sour cream, at room temperature

Melt the chocolate with the butter and corn syrup in a double boiler over barely simmering water. Remove from the heat and whisk until smooth.

Whisk in the half-and-half and sour cream. Use while still soft.

NOTE: This was too soft for me so I added icing sugar until I got the consistency right.

Wednesday, January 4, 2012

Butter cookies....The best ever!


Oh...these cookies!How can I ever give a description?Maybe I should say t'was "love at first bite!"

The crispy outside gives way to the utterly crumbly,buttery,melt in your mouth goodness within....And before you even know...they're gone!And believe me,you CANNOT stop at 1 or 2 or 3....you simply have to gorge on a whole batch at one go and it will be too late when you realise that you've almost devoured a whole slab of butter!What a grave sin....And you're not even sorry!!
So pull yourselves up ladies.Make them and your husbands will want to marry you again and your children will never want to get married and leave you....Okay...I went too far here;Just make them and you'll never regret!

BUTTER COOKIES(makes about 50 bite sized cookies)

1 c Salted butter(good quality,softened)
3/4 c sugar(fine,granulated)
1 large egg(separated)
2 c All purpose flour
11/2 tsp flavoring (I prefer vanilla)

Method
Preheat oven to 350 f/180 c.
Beat butter and sugar until well combined.
Add egg yolk and vanilla and beat again.
Add flour(in three batches)and beat until just combined.
Scoop out teaspoons of the dough and roll into balls.
Place them on a cookie sheet(a few cms apart).
Bake them for 16 minutes.Each oven is different.So keep watch.The cookies are best when the bottom just starts to brown.
When done,take them out and keep them on the baking sheet for 5 minutes before you carefully transfer them with a spatula onto a cooling rack.
Wait for cookies to cool completely else they wont be crisp.
Enjoy!

For a variation,after you roll them,make a small dent on the top with your finger.Drop a little of your favorite jam into the dent and bake till done!

Tuesday, January 3, 2012

Good old flan/Caramel custard


A set of ramekins were on my wishlist for a very long time.A few weeks ago,I found a beautiful set of Christmas themed ramekins at Crate and Barrel.And since Santa was busy with all the good people,I decided to buy my own present...
Look at them...Ain't they pretty?
I searched the net for all possible recipes a ramekin could hold!And lo....there came Ria with her CARAMEL CUSTARD.Thats it!Nothing could be better than this simple,humble dessert....Ria had added condensed milk to the original recipe and nothing with condensed milk in it could ever go wrong!So I made it right away.It is a really simple and quick dessert to fix except for the rather long baking time of 45 minutes.And it came out simply delicious!Enjoy it warm or chilled.Its a classic!
You can either unmould it onto a dessert plate or if your ramekins are exceptionally cute,like mine...serve it in them!

Linking this to Cakes,Cookies and Desserts event at Spice and Sugar Tales


CARAMEL CUSTARD/FLAN

2 c whole milk
1/2 c sweetened condensed milk
5 tbsp white sugar
2 eggs
1 tsp vanilla flavor(Iused 1 vanilla bean)
1/2 c sugar for caramelising

Method:
Pre-heat the oven to 350 F/ 180C .
In a saucepan,add milk, condensed milk,vanilla flavor and 5 tbsp sugar and bring to a boil.If you are using vanilla bean,split it open, scrape down the caviar and dump it all into the milk and boil.
Let it cool for a few minutes.
Meanwhile,in a medium bowl, beat the eggs till well blended. Drizzle hot milk into it while beating all the time.
Strain the mixture to avoid any egg white lumps in the custard.
In a pan, on medium heat, caramelise 1/2 c sugar till golden brown and pour it into the pudding moulds. Swirl to coat the sides. Pour the milk-egg mixture into the moulds.
Place the moulds into a baking tin with tall sides and pour hot water just so that the bowls are immersed halfway. Bake for 45 mins or till a knife inserted comes out smooth.Let it cool for half an hour.Enjoy!

Monday, January 2, 2012

Cake decoration....The Wilton way.


My final cake for Wilton course 1.The classes were a lot of fun though it was a little too pricey.All materials for the course were not included in the kit.You still had to buy lots of extra stuff and they were quite expensive too.However I was lucky to have the very talented "REEM "as my instructor who ensured that the classes were super fun!!
This is my very first iced cake.You can clearly see my poor piping skills.To cover the cake smoothly with buttercream is not the easiest thing in the world!And the Wilton roses...ugh!What a pain!But on the whole the final cake was"okay" to look at.I'm glad I took the classes anyway.